


Caulk remains one of the most versatile and cost-effective materials in any homeowner’s toolkit, capable of solving numerous household problems with minimal effort and expense. From exterior repairs that protect against weather damage to interior fixes that enhance aesthetics and functionality, this humble tube of sealant proves indispensable for maintaining property value and comfort. Understanding the full range of applications for different caulk types empowers homeowners to tackle repairs confidently whilst avoiding costly professional callouts for jobs that require little more than steady hands and basic preparation.
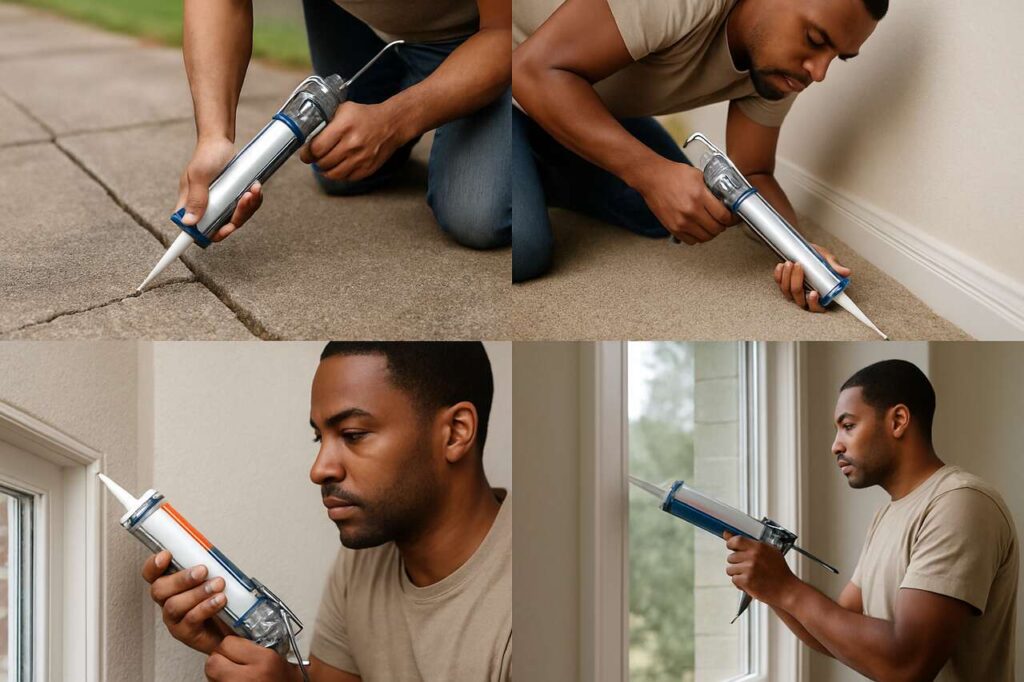
Repairing driveway cracks
Selecting appropriate caulk for exterior concrete
Driveway cracks require specialised flexible sealants designed to withstand temperature fluctuations and vehicle weight. Polyurethane-based caulks offer superior durability for concrete surfaces, expanding and contracting with seasonal changes without losing adhesion. Standard acrylic caulks prove inadequate for this application, as they lack the flexibility needed for surfaces subjected to constant stress and weathering.
Before application, proper preparation determines success:
- Remove all loose debris, dirt and vegetation from cracks using a wire brush
- Clean thoroughly with a pressure washer and allow complete drying
- Cut the caulk tube nozzle at a 45-degree angle matching crack width
- Apply steady pressure whilst moving along the crack in continuous motion
- Smooth with a putty knife or gloved finger for professional finish
Timing and weather considerations
Temperature significantly impacts caulk performance. Apply when temperatures remain between 5°C and 32°C, avoiding rainy conditions or extreme heat. Spring and autumn provide ideal application windows, allowing proper curing before winter freezes or summer expansion occurs. Most polyurethane caulks require 24-48 hours to cure fully, during which time the driveway should remain unused.
Addressing driveway damage promptly prevents water infiltration that leads to more extensive structural problems, making this repair particularly valuable for protecting the foundation of your home’s exterior maintenance strategy.
Restoring window seals
Identifying deteriorated window caulking
Window seals deteriorate over time, creating energy inefficiency and potential water damage. Signs of failing caulk include visible cracks, gaps between frame and wall, drafts near windows, and condensation between panes. Regular inspection of window perimeters, particularly on weather-facing sides, helps identify problems before they escalate into costly repairs or energy waste.
| Caulk Type | Durability | Paintability | Best Application |
|---|---|---|---|
| Silicone | 20-30 years | No | Exterior windows |
| Acrylic latex | 5-10 years | Yes | Interior windows |
| Hybrid polymer | 15-25 years | Yes | Both applications |
Application technique for lasting results
Remove old caulk completely using a utility knife or specialised removal tool, as new caulk adheres poorly over deteriorated material. Clean surfaces with methylated spirits to eliminate residue and allow thorough drying. Apply new caulk in smooth, continuous beads, maintaining consistent pressure and speed. Tool the bead within five minutes using a caulk finishing tool or moistened finger, creating a slightly concave surface that sheds water effectively.
Properly sealed windows not only reduce energy bills but also create the foundation for maintaining a watertight building envelope, which proves equally important when addressing moisture-prone areas inside the home.
Tile grout in the bathroom
Understanding when caulk replaces grout
Whilst grout fills most tile joints, flexible caulk proves superior for specific bathroom locations. Apply caulk rather than grout where tiles meet bathtubs, shower trays, sinks, and in corners where walls meet floors. These movement joints require flexibility that rigid grout cannot provide, as different materials expand and contract at varying rates with temperature and humidity changes.
Preventing mould and water damage
Bathroom-specific caulks contain mildewcides that resist mould growth in persistently damp environments. Clear or white sanitary-grade silicone remains the preferred choice for wet areas, offering waterproof protection and flexibility. Application requires meticulous preparation:
- Remove existing caulk and mould completely with appropriate cleaners
- Dry the area thoroughly using a hairdryer if necessary
- Mask adjacent surfaces with painter’s tape for clean lines
- Apply caulk in steady, controlled motion
- Tool immediately with soapy water solution for smooth finish
- Remove tape before caulk skins over
Maintaining watertight seals in bathrooms prevents structural damage and extends the lifespan of fixtures, whilst similar sealing principles apply to kitchen installations where water exposure creates comparable challenges.
Sealing sink edges
Kitchen and bathroom sink installations
The junction between sinks and countertops represents a critical waterproofing point often overlooked until leaks develop. Whether installing new sinks or refreshing existing seals, appropriate caulk prevents water from seeping beneath fixtures and damaging cabinetry. Clear silicone caulk works universally across various sink and countertop materials, maintaining invisible protection whilst coloured versions match specific finishes.
Proper sealing technique
For undermount sinks, apply caulk to the underside rim before securing to the countertop. With drop-in sinks, run a continuous bead around the entire perimeter where the sink lip meets the counter surface. Ensure the area remains completely dry before application, as moisture prevents proper adhesion. Smooth the bead within minutes using a caulk tool, creating a slight concave profile that channels water away from the joint rather than allowing pooling.
Beyond horizontal surfaces, vertical joints throughout the home also benefit from strategic caulk application, particularly where architectural elements meet walls and require both aesthetic finish and practical protection.
Fixing loose skirting boards
Addressing gaps and movement
Skirting boards naturally develop gaps as buildings settle and timber expands or contracts with humidity changes. Rather than undertaking extensive carpentry work, decorators’ caulk provides an efficient solution for gaps up to 5mm. This flexible acrylic filler accommodates minor movement whilst creating seamless transitions between skirting and walls that accept paint for invisible repairs.
Application for professional appearance
Clean gaps thoroughly, removing dust and loose paint. Apply caulk directly into gaps, slightly overfilling to account for shrinkage during curing. Tool immediately with a dampened finger or profiling tool, creating a smooth radius that blends skirting to wall. Wipe excess immediately with a damp cloth. Once cured, sand lightly if necessary and paint to match existing décor. This technique proves particularly effective for:
- Gaps along the top edge of skirting boards
- Separations at mitered corners
- Spaces where skirting meets door architraves
- Minor damage from furniture impacts
Addressing these architectural details enhances overall room appearance whilst the same adhesive properties that secure skirting boards prove valuable for stabilising floor coverings that have worked loose over time.
Sturdy support for loose carpets
Securing carpet edges and seams
Carpet edges that have lifted near doorways or along seams create trip hazards and accelerate wear. Latex-based carpet adhesive or flexible construction adhesive provides effective solutions without requiring professional re-stretching. For edges, lift the carpet slightly, apply adhesive to the subfloor in a zigzag pattern, then press firmly and weight down until cured. For seams, apply adhesive to both carpet backing edges, press together, and roll flat.
Temporary and permanent solutions
Double-sided carpet tape offers temporary fixes for rental properties or situations requiring reversibility, whilst permanent adhesive provides lasting security for owned homes. Apply adhesive sparingly to prevent seepage through carpet backing that creates visible staining. Work in small sections, ensuring proper alignment before adhesive sets. Weight repaired areas with heavy books or furniture for 24 hours to ensure complete bonding.
This approach extends carpet lifespan significantly by preventing the progressive damage that occurs when loose sections receive concentrated wear and tear.
Caulk’s versatility extends far beyond simple gap-filling, offering practical solutions for structural repairs, weatherproofing, aesthetic improvements and safety enhancements throughout residential properties. Selecting appropriate caulk types for specific applications ensures durability and performance, whilst proper surface preparation and application technique determine long-term success. These six applications represent merely a fraction of caulk’s potential uses, demonstrating how this affordable material empowers homeowners to maintain and improve their properties efficiently. Regular inspection and timely application of appropriate sealants prevents minor issues from developing into expensive repairs, making caulk an essential component of proactive home maintenance strategies.