


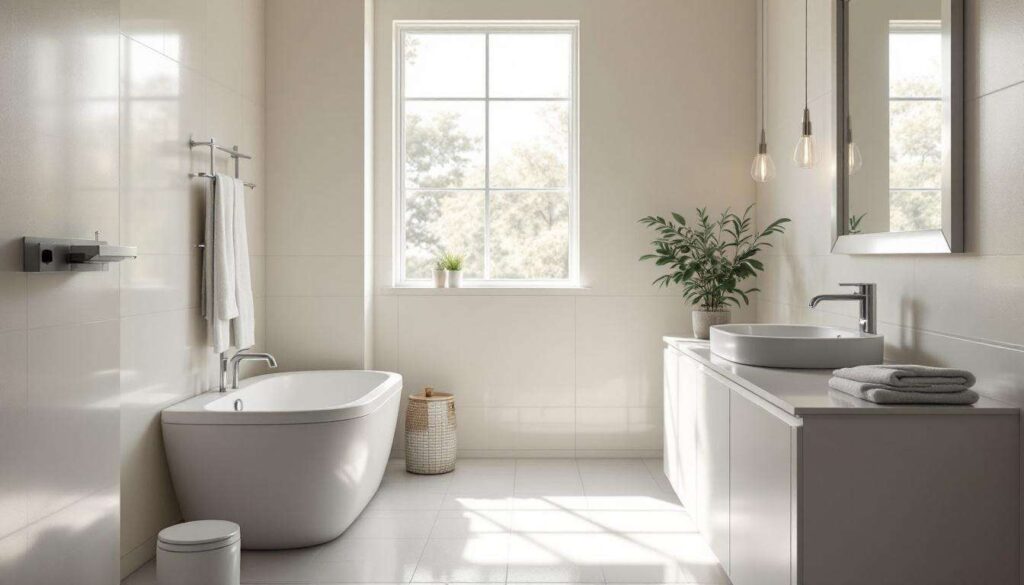
A simple can of paint holds remarkable potential to revolutionise your bathroom’s appearance without requiring extensive renovations or a substantial budget. This straightforward approach offers homeowners an accessible method to refresh tired tiles, outdated cabinetry, or dull walls, creating a space that feels entirely renewed. With proper preparation, technique, and colour selection, even the smallest bathroom can undergo a dramatic transformation that rivals professional makeovers. The key lies in understanding which surfaces to target, how to prepare them correctly, and which application methods deliver lasting, impressive results.
Choosing the right colour: optimising space
Understanding colour psychology in compact spaces
The colour you select fundamentally impacts how spacious your bathroom feels. Light shades such as soft whites, pale blues, and gentle greys reflect natural light more effectively, making even the smallest bathrooms appear larger and more inviting. These tones create an airy atmosphere that counteracts the claustrophobic feeling often associated with confined spaces. Conversely, darker colours absorb light but can add dramatic sophistication when used strategically on a single accent wall or lower sections of the room.
Matching paint finishes to bathroom conditions
Bathrooms demand specific paint formulations that withstand high humidity and frequent temperature fluctuations. Consider these essential finish types:
- Satin finish: offers moderate sheen whilst resisting moisture and mildew growth
- Semi-gloss: provides superior water resistance and easy cleaning for high-traffic areas
- Gloss finish: delivers maximum durability and moisture protection, ideal for trim and cabinetry
- Specialist bathroom paint: contains anti-mould additives specifically designed for humid environments
Coordinating with existing fixtures
Your paint choice should complement rather than clash with permanent fixtures such as sanitaryware, taps, and flooring. White or cream sanitaryware pairs beautifully with virtually any colour palette, whilst chrome fixtures suit cooler tones and brass or gold hardware harmonises with warmer hues. Create a cohesive scheme by selecting paint that either matches your grout colour for seamless integration or contrasts it for visual interest.
Once you’ve identified the perfect colour and finish for your space, attention must turn to the preparation work that ensures your paint adheres properly and delivers professional-looking results.
Preparing the surface: key steps before painting
Cleaning and degreasing thoroughly
Surface preparation determines the longevity of your paint job more than any other factor. Begin by removing all soap residue, body oils, and accumulated grime using a solution of warm water and sugar soap or a dedicated degreaser. Pay particular attention to areas around the sink, bath, and shower where product build-up concentrates. Rinse thoroughly with clean water and allow surfaces to dry completely, which typically requires 24 hours in well-ventilated conditions.
Repairing imperfections and damage
Inspect walls, tiles, and cabinetry for cracks, chips, or holes that require attention. Fill these imperfections with appropriate materials:
- Flexible filler: for areas prone to movement or vibration
- Waterproof sealant: around baths, showers, and sinks
- Tile repair compound: for chipped ceramic surfaces
- Wood filler: for damaged cabinetry or wooden trim
Sand repaired areas smooth once dry, creating an even surface that won’t telegraph through your paint layers.
Priming for optimal adhesion
Never underestimate the importance of quality primer application. Specialist primers designed for bathrooms create a barrier between existing surfaces and your topcoat, preventing stains from bleeding through whilst improving paint adhesion. For tiles, use a dedicated tile primer that chemically bonds to glazed surfaces. When painting over dark colours or bold patterns, tinted primer reduces the number of topcoats required, saving both time and money.
With surfaces properly prepared and primed, mastering the application techniques becomes the next critical phase in achieving a flawless finish.
Painting techniques: achieving the perfect application
Selecting appropriate tools for different surfaces
The tools you choose directly influence the quality of your finished result. Synthetic brushes work best with water-based paints, whilst natural bristles suit oil-based formulations. For walls, a medium-pile roller provides efficient coverage, whereas foam rollers create smoother finishes on cabinetry and doors. Angled cutting-in brushes enable precise work around fixtures and edges.
| Surface Type | Recommended Tool | Application Method |
|---|---|---|
| Walls | 9-inch roller with medium pile | Vertical strokes in W pattern |
| Tiles | Small foam roller or brush | Thin, even coats following grout lines |
| Cabinetry | Foam roller and quality brush | Direction of wood grain |
| Trim | Angled brush 1-2 inches | Long, smooth strokes |
Managing drying times between coats
Patience proves essential when painting bathrooms. Humidity levels significantly affect drying times, often requiring longer intervals between coats than manufacturer guidelines suggest. Ensure adequate ventilation by opening windows or using extractor fans, but avoid creating draughts that might cause uneven drying or attract dust particles. Most bathroom paints require a minimum of four hours between coats, though overnight drying produces superior results.
Avoiding common application mistakes
Several frequent errors compromise otherwise careful work. Overloading your brush or roller creates drips and uneven coverage, whilst applying paint too thinly results in patchy colour that requires additional coats. Maintain a wet edge by working in manageable sections, blending each area into the previous one before it dries. Never paint in direct sunlight or extreme temperatures, as these conditions cause premature drying and poor adhesion.
Understanding these fundamental techniques provides the foundation for tackling the largest surface area in your bathroom with confidence and skill.
Painting the walls: tips for a professional finish
Cutting in edges and corners precisely
Professional painters always begin by cutting in around edges, corners, and fixtures before rolling the main wall areas. Load your angled brush moderately, removing excess paint on the container rim. Create a steady hand by bracing your painting arm against your body or the wall itself. Draw a precise line approximately 3-5 millimetres from adjacent surfaces, feathering the paint outward to avoid visible brush marks where rolled sections will meet cut-in areas.
Rolling technique for uniform coverage
Achieve consistent results by following a systematic approach:
- Load your roller evenly by rolling it in the paint tray several times
- Remove excess by rolling on the tray’s ribbed section
- Apply paint in a large W or M pattern across a one-metre square section
- Fill in the pattern with vertical strokes, maintaining light, even pressure
- Blend each section into the previous one whilst the edges remain wet
- Avoid stopping mid-wall, which creates visible lap marks
Addressing texture and finish inconsistencies
If your first coat reveals uneven texture or patchy coverage, resist the temptation to apply additional paint immediately. Allow the coat to dry completely, then lightly sand any raised areas or drips with fine-grit sandpaper. Remove sanding dust with a tack cloth before applying subsequent coats. Most bathroom walls require two to three coats for optimal colour saturation and durability, particularly when covering darker existing colours or bold patterns.
Whilst freshly painted walls create immediate impact, coordinating additional elements amplifies the transformation and creates a cohesive design scheme.
Complementary transformations: matching accessories
Updating hardware and fixtures
Small changes to bathroom hardware deliver disproportionate visual impact. Replacing dated cabinet handles, towel rails, and toilet roll holders with contemporary alternatives costs relatively little but modernises the entire space. Consider finishes that complement your new colour scheme: brushed nickel or chrome suits cooler paint tones, whilst brass, copper, or matte black hardware enhances warmer palettes.
Selecting coordinating soft furnishings
Textile elements tie your colour scheme together and add warmth to painted surfaces. Choose towels, bath mats, and shower curtains that either match your wall colour for a monochromatic scheme or provide complementary contrast. Texture adds visual interest in single-colour schemes, so incorporate waffle-weave towels, textured bath mats, or patterned window treatments that reference your paint choice.
Incorporating decorative elements strategically
Resist overcrowding your newly painted bathroom with excessive decoration. Instead, select a few quality pieces that enhance rather than distract:
- A statement mirror in a finish that coordinates with hardware
- Waterproof artwork or prints in complementary colours
- Plants that thrive in humid conditions, adding natural colour
- Storage solutions that match your colour scheme whilst reducing clutter
These finishing touches complete your bathroom’s transformation, but maintaining the fresh appearance requires ongoing attention and care.
Maintaining a durable paint: tips and precautions
Establishing proper ventilation habits
Adequate ventilation prevents the moisture damage that compromises even quality bathroom paint. Run your extractor fan during showers and baths, continuing for at least 20 minutes afterwards to remove excess humidity. If your bathroom lacks mechanical ventilation, open windows whenever possible to promote air circulation. This simple habit dramatically extends paint life by preventing mould growth and paint degradation.
Cleaning painted surfaces correctly
Regular gentle cleaning maintains your paint’s appearance far more effectively than occasional intensive scrubbing. Wipe walls weekly with a soft, damp cloth to remove surface dust and moisture spots. For stubborn marks, use a solution of warm water with a small amount of mild detergent, avoiding abrasive cleaners that damage paint finishes. Always test cleaning products on an inconspicuous area first, and rinse thoroughly with clean water to prevent residue build-up.
Addressing damage promptly
Small chips, scratches, or areas of peeling paint require immediate attention to prevent moisture infiltration and further damage. Keep leftover paint for touch-ups, storing it in an airtight container with the date and room location clearly marked. Minor repairs blend seamlessly when addressed quickly, whilst delayed fixes often necessitate repainting entire walls to achieve uniform appearance.
A single can of paint, applied with proper preparation and technique, genuinely transforms bathroom spaces from dated to delightful. The process demands attention to surface preparation, appropriate colour and finish selection, and correct application methods, but rewards these efforts with professional-looking results that enhance daily life. By coordinating accessories and establishing maintenance routines, homeowners preserve their bathroom’s refreshed appearance for years. This accessible approach to renovation proves that dramatic change needn’t require extensive budgets or professional contractors, just patience, planning, and quality materials applied with care.