


Pruning shears are indispensable tools for any gardener, yet they often suffer from neglect between seasons. Rust accumulation and dull blades not only make cutting tasks more laborious but can also inflict damage on plants, creating ragged wounds that invite disease. Restoring these essential implements to proper working condition requires neither specialised expertise nor expensive equipment. With common household items and straightforward techniques, even severely corroded shears can be brought back to full functionality, ensuring cleaner cuts and healthier plants throughout the growing season.
Understanding rust and its impact
The chemistry of corrosion
Rust forms when iron or steel reacts with oxygen and moisture, creating iron oxide. Pruning shears, typically constructed from carbon steel or stainless steel, remain vulnerable to this oxidation process, particularly when stored in damp conditions or left uncleaned after use. The reddish-brown substance that develops on blade surfaces is not merely cosmetic; it actively degrades the metal, creating pits and rough textures that compromise cutting efficiency.
Consequences for plant health
The impact of rusty, dull shears extends beyond mere inconvenience. When blades fail to make clean, precise cuts, they instead crush and tear plant tissue. These ragged wounds take longer to heal and provide entry points for pathogens and pests. The following problems commonly arise:
- Increased susceptibility to bacterial and fungal infections
- Delayed healing and regrowth
- Greater water loss through damaged tissue
- Potential transfer of disease between plants
Additionally, corroded blades require more physical force to cut, leading to hand fatigue and imprecise pruning decisions. This understanding of rust’s detrimental effects underscores the importance of proper tool maintenance.
Necessary equipment for cleaning pruning shears
Essential cleaning supplies
Restoring rusty shears requires surprisingly few materials, most of which are readily available in typical households. The primary rust-removal agent is white vinegar, which contains acetic acid capable of dissolving iron oxide. For heavily rusted tools, approximately four litres may be needed to ensure complete submersion of the affected areas.
| Item | Purpose | Quantity needed |
|---|---|---|
| White vinegar | Dissolves rust through acidic reaction | 1-4 litres |
| Steel wool or wire brush | Removes loosened rust and debris | 1 pad or brush |
| Baking soda | Neutralises acid, prevents further corrosion | 2-3 tablespoons |
| Lubricating oil | Protects against future rust | Small amount |
Additional helpful tools
Beyond the basic supplies, several items enhance the cleaning process. Protective gloves shield hands from both vinegar and rust particles. A container large enough to hold the shears whilst fully submerged in vinegar is essential. Clean cloths or rags facilitate drying, whilst a small amount of salt can be combined with vinegar to create a more abrasive cleaning paste for stubborn rust spots. These straightforward materials form the foundation for effective restoration.
Simple method to remove rust
The soaking process
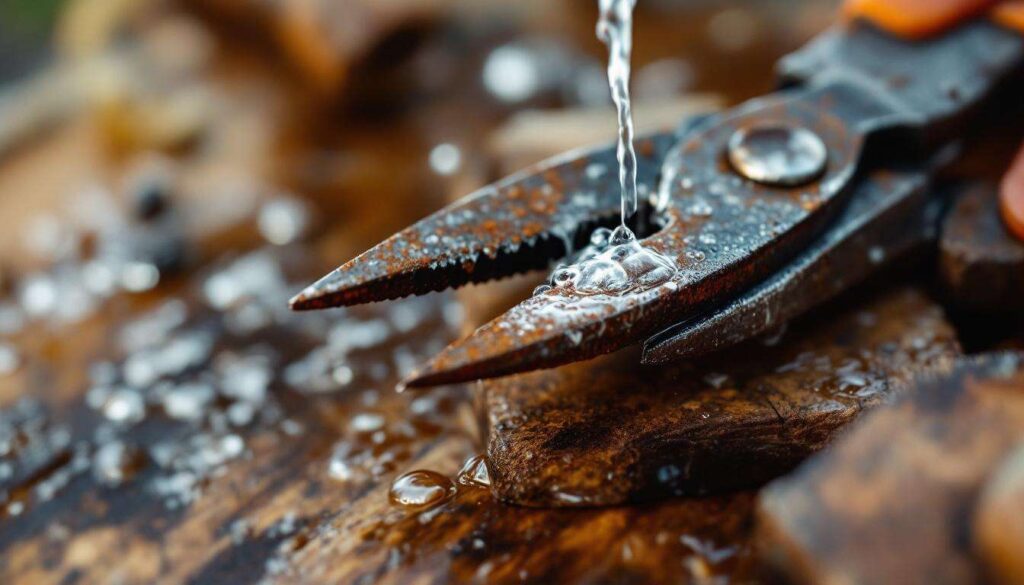
Begin by disassembling the shears if possible, separating the blades to allow thorough treatment of all surfaces. Place the rusty components in a container and pour white vinegar over them until completely submerged. The duration of soaking depends on rust severity: light surface rust may require only two to three hours, whilst heavily corroded tools benefit from overnight immersion. During this period, the acetic acid works to break down the iron oxide, loosening its bond with the underlying metal.
Mechanical rust removal
After soaking, remove the shears from the vinegar and examine the rust. Much of it should now appear loose and flaky. Using steel wool, a wire brush, or even crumpled aluminium foil, scrub the blade surfaces with firm, consistent strokes. Pay particular attention to:
- The cutting edge where precision matters most
- Pivot points where rust can impede movement
- Textured or grooved areas that trap debris
- The blade backs which contact plant material
Neutralising and protecting
Once rust has been removed, rinse the shears thoroughly under clean water to eliminate vinegar residue. Create a paste using baking soda and water, then apply it to the metal surfaces. This alkaline treatment neutralises any remaining acid, preventing continued corrosion. After a few minutes, rinse again and dry completely using a clean cloth. Immediate and thorough drying is crucial, as any moisture left on the metal will initiate new rust formation. With the metal now clean and dry, attention can turn to restoring the cutting edge.
Effective sharpening techniques
Identifying the bevel angle
Pruning shears typically feature a bevelled edge on one side of the blade, whilst the other remains flat. Before sharpening, examine the blade to identify this angle, usually between 10 and 20 degrees. Maintaining the original bevel angle ensures optimal cutting performance. Attempting to sharpen both sides or changing the angle can actually reduce effectiveness and damage the tool.
Sharpening with a file
A flat mill file or dedicated sharpening file provides excellent results for most gardeners. Secure the shears in a vice or hold them firmly against a stable surface. Position the file against the bevelled edge, matching the existing angle. Using smooth, consistent strokes, draw the file across the blade from the pivot point towards the tip. Apply moderate pressure and work in one direction only rather than using a back-and-forth sawing motion. The following approach yields best results:
- Make 10-15 strokes along the entire cutting edge
- Maintain consistent angle and pressure throughout
- Check progress frequently to avoid over-sharpening
- Remove any burr from the flat side with light strokes
Alternative sharpening methods
Whetstones offer another effective sharpening option, particularly for those comfortable with traditional techniques. After soaking the stone in water, hold it against the bevelled edge at the appropriate angle and use circular or linear motions. Diamond sharpeners and ceramic rods also work well for touch-ups between major maintenance sessions. Regardless of method, the goal remains the same: creating a sharp, smooth edge that slices cleanly through plant tissue. Proper sharpening restores functionality, but lasting performance requires ongoing care.
Maintenance to prevent future rust
Post-use cleaning routine
Prevention proves far easier than remediation when managing rust. After each pruning session, wipe blade surfaces with a damp cloth to remove sap, soil, and plant debris. These organic materials retain moisture and accelerate corrosion. For particularly sticky residues, a cloth dampened with rubbing alcohol or methylated spirits effectively dissolves plant compounds without leaving moisture behind. This simple habit takes mere seconds but dramatically extends tool lifespan.
Lubrication and storage
Once cleaned and dried, apply a thin layer of lubricating oil to all metal surfaces. Suitable options include:
- Specialist tool oils designed for garden equipment
- Gun oil or mineral oil
- Camellia oil, traditionally used for blade preservation
- Light machine oil
The oil creates a protective barrier against moisture and oxygen, the two elements necessary for rust formation. Store shears in a dry location away from ground contact and excessive humidity. A tool shed with adequate ventilation proves superior to damp garages or outdoor storage.
Seasonal deep maintenance
Before and after the primary pruning season, conduct thorough inspections and maintenance. Disassemble the shears to clean pivot points, apply fresh lubricant, and check for any developing rust spots. This proactive approach identifies problems whilst they remain minor and easily addressed. These preventive measures form the foundation of tool longevity, though additional practices can further optimise performance.
Additional tips for optimal maintenance
Disinfection practices
Beyond rust prevention, disease prevention requires regular disinfection, particularly when moving between different plants or after pruning diseased material. Wipe blades with a solution of one part household bleach to nine parts water, or use rubbing alcohol. Allow the disinfectant to air dry rather than wiping it off, ensuring adequate contact time to eliminate pathogens. This practice protects plant health whilst complementing rust prevention efforts.
Tension adjustment
Many pruning shears feature adjustable pivot bolts that control blade tension. If shears feel loose or blades misalign during cutting, tightening this bolt may resolve the issue. Conversely, overly tight mechanisms cause excessive wear and hand fatigue. The ideal tension allows smooth opening and closing whilst maintaining blade contact throughout the cutting motion. Regular checking and minor adjustments maintain optimal function.
Knowing when replacement becomes necessary
Despite diligent maintenance, pruning shears eventually reach the end of their serviceable life. Deep pitting from severe rust, cracks in the metal, or blades worn too thin for safe sharpening all indicate replacement time. Quality shears, properly maintained, can provide many years of reliable service, but recognising when restoration is no longer viable prevents frustration and potential injury. Investing in durable, well-constructed tools from the outset maximises the return on maintenance efforts.
Maintaining pruning shears in optimal condition requires minimal investment of time and resources whilst delivering substantial benefits. Regular cleaning prevents rust accumulation, proper sharpening ensures clean cuts that promote plant health, and consistent lubrication extends tool lifespan. By implementing these straightforward practices, gardeners transform potentially frustrating maintenance tasks into simple routines that preserve both equipment and the vitality of their gardens. Well-maintained shears make pruning more efficient and enjoyable whilst demonstrating the broader principle that proper tool care enhances every aspect of gardening success.