


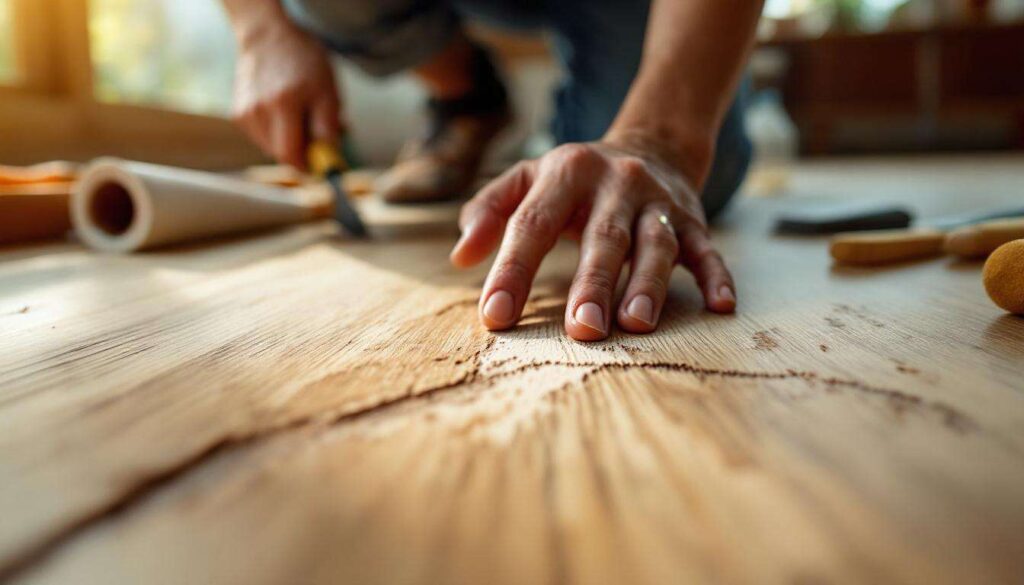
Wooden floors add warmth and character to any home, but even the most carefully maintained surfaces can fall victim to scratches from everyday life. Whether caused by furniture being moved, pet claws, or dropped objects, these imperfections can be frustrating for homeowners who take pride in their interiors. The good news is that many scratches can be addressed without the expense and disruption of refinishing an entire room. With the right approach and a few simple techniques, it’s possible to restore your floor’s appearance and protect your investment.
Understanding different types of scratches on wood
Before attempting any repair, it’s essential to identify the severity of the damage to your wooden floor. Not all scratches are created equal, and the treatment method will depend entirely on how deeply the wood has been affected.
Surface-level scratches
Superficial scratches affect only the protective finish layer without penetrating the wood itself. These marks typically appear as light lines that catch the light but don’t feel particularly rough to the touch. They’re the easiest type to address and often respond well to simple polishing techniques. You can usually identify them by running your fingernail gently across the scratch; if it doesn’t catch or sink into the mark, you’re likely dealing with a surface-level issue.
Medium-depth scratches
These scratches penetrate through the finish and into the wood’s surface layer. They’re visible as darker lines and can be felt when running your hand across the floor. Medium-depth scratches require more attention than superficial ones but still don’t necessitate professional intervention in most cases.
Deep gouges and scratches
The most severe type of damage involves deep gouges that penetrate significantly into the wood. These are often caused by heavy furniture being dragged or sharp objects being dropped. They appear as noticeable indentations and may expose raw wood beneath the finish. While more challenging to repair, even these can be addressed with patience and the right materials.
Once you’ve assessed the type of damage you’re dealing with, you’ll be better equipped to select the appropriate repair method.
Preparing the damaged area before repair
Proper preparation is crucial for achieving professional-looking results when repairing scratched wooden floors. Rushing this stage can compromise the effectiveness of your repair efforts.
Cleaning the affected area
Begin by thoroughly cleaning the scratched section and surrounding area. Use a soft cloth dampened with a wood-safe cleaner to remove dust, dirt, and any accumulated grime. This step ensures that no debris interferes with the repair materials. Allow the area to dry completely before proceeding.
Assessing the surrounding finish
Examine the finish around the scratch to determine its condition. If the surrounding area is worn or damaged, you may need to blend your repair more extensively. Take note of the floor’s sheen level, whether it’s matte, satin, or glossy, as this will inform your finishing choices.
Gathering necessary materials
Depending on the scratch severity, you’ll need different supplies:
- Fine-grit sandpaper (220-grit or higher)
- Clean, lint-free cloths
- Wood filler or putty (for deeper scratches)
- Matching wood stain (if needed)
- Protective finish or polish
- Cotton swabs for precise application
Having everything prepared in advance will make the repair process smoother and more efficient.
Simple techniques to fix superficial scratches
For scratches that haven’t penetrated the wood itself, several straightforward methods can restore your floor’s appearance without extensive effort.
The buffing method
Often, superficial scratches can be minimised through gentle buffing. Apply a small amount of wood floor polish to a soft cloth and rub it into the scratch using circular motions. The polish fills in the microscopic gaps and reflects light more evenly, making the scratch less noticeable. This technique works particularly well on floors with a glossy finish.
Using commercial scratch repair pens
Scratch repair markers designed specifically for wooden floors offer a convenient solution. These products contain stain and finish in one applicator, allowing you to colour and seal scratches simultaneously. Select a shade that matches your floor as closely as possible, apply it carefully along the scratch, and wipe away any excess with a clean cloth.
The steel wool approach
For slightly more stubborn surface scratches, very fine steel wool (0000 grade) can be used cautiously. Rub gently along the grain of the wood, applying minimal pressure. Follow immediately with a wood floor polish to restore the protective layer you’ve just smoothed. This method requires a delicate touch to avoid creating additional damage.
When surface-level repairs aren’t sufficient, you’ll need to employ more substantial techniques for deeper damage.
Using household products to treat deeper scratches
Surprisingly, several common household items can effectively address more significant scratches without requiring specialised products.
The walnut technique
For medium-depth scratches in darker woods, a fresh walnut can work wonders. Rub the meat of the walnut directly into the scratch, allowing the natural oils to fill and darken the damaged area. The oils penetrate the wood and help disguise the scratch by matching the surrounding colour. After application, buff the area with a soft cloth to blend the treatment.
Vinegar and olive oil mixture
Create a simple repair solution by combining equal parts white vinegar and olive oil. Apply this mixture to the scratch using a cotton swab, working it into the damaged area. The vinegar helps clean whilst the oil nourishes the wood and adds colour. This method is particularly effective for light-coloured woods.
Tea bag treatment
Strongly brewed black tea contains tannins that can darken scratches in wood. Steep a tea bag in hot water for several minutes, allow it to cool slightly, then apply the liquid to the scratch with a cotton swab. Multiple applications may be necessary to achieve the desired colour match. Once dry, seal the area with an appropriate finish.
Filling deeper gouges
For scratches that have created noticeable depressions, wood filler becomes necessary. Choose a filler that matches your floor’s colour or can be stained afterwards. Apply the filler with a putty knife, slightly overfilling the scratch. Once completely dry, sand it flush with the surrounding floor using fine-grit sandpaper. Apply matching stain if needed, then seal with an appropriate finish.
After completing repairs, ensuring a consistent appearance across the entire floor requires careful finishing touches.
Tip for a uniform finish after repair
The key to invisible repairs lies in properly blending the treated area with the surrounding floor.
Matching the sheen level
Apply a finish that matches the existing floor’s sheen. Test products on an inconspicuous area first to ensure compatibility. Use thin coats rather than one heavy application, as this provides better control over the final appearance.
Feathering the edges
When applying finish to the repaired area, extend slightly beyond the immediate scratch and feather the edges outward. This technique prevents visible lines of demarcation between treated and untreated areas. Use a soft cloth to blend the finish gradually into the surrounding floor.
Allowing proper curing time
Patience during the drying process is essential. Follow the manufacturer’s recommended drying times and avoid walking on the repaired area until fully cured. Premature traffic can compromise the repair and create new imperfections.
Once you’ve successfully repaired existing damage, implementing preventive measures will help preserve your floor’s condition.
Maintaining the wooden floor to avoid future scratches
Prevention is invariably easier than repair when it comes to protecting wooden floors from scratches.
Protective measures for furniture
Attach felt pads to the bottom of all furniture legs to create a buffer between hard surfaces and your floor. Replace these pads regularly as they become compressed or dirty. For frequently moved furniture, consider using furniture glides designed specifically for wooden floors.
Strategic placement of rugs and mats
Position rugs in high-traffic areas and beneath furniture that’s moved regularly. Place mats at entrances to capture dirt and grit that can act as abrasives. Ensure rug backings are safe for wooden floors, as some materials can cause discolouration.
Regular cleaning routine
Establish a consistent cleaning schedule:
- Sweep or vacuum daily to remove abrasive particles
- Use only wood-safe cleaning products
- Avoid excessive water, which can damage wood
- Address spills immediately to prevent staining
- Trim pet nails regularly to minimise scratching
Periodic maintenance applications
Apply a protective coating annually to maintain the floor’s finish. This layer acts as a sacrificial barrier that absorbs minor damage before it reaches the wood itself. Regular maintenance significantly extends the time between major refinishing projects.
Scratched wooden floors need not spell disaster or necessitate expensive professional refinishing. By understanding the nature of the damage, preparing surfaces properly, and applying appropriate repair techniques, most scratches can be effectively addressed at home. Simple household products often prove surprisingly effective for minor to moderate damage, whilst proper finishing techniques ensure repairs blend seamlessly with existing flooring. Implementing preventive measures protects your investment and maintains the beauty of your wooden floors for years to come. With patience and the right approach, you can keep your floors looking their best without the disruption and expense of whole-room refinishing.